 |
|
 03-09-2022, 01:14 PM
|
#61
|
|
Winnebago Owner
Join Date: Oct 2020
Location: Asheville, NC
Posts: 1,708
|
Quote:
Originally Posted by BobC

If it is the 7mm OSB, this is good news and either SS screws (#12) or well nuts will still work and you'll have more holding power than you would have in the 1/8" Luan ply of a foam sandwich.
If you can place the front edge on a cross member (rafter) with longer screws, all the better. You can use a stud finder to locate the cross members or, sometimes, they will be faintly visible after a morning dew on the roof. If you contact Winnebago, they should be able to supply drawings with measurements.
|
Bob,
I think Ill try well nuts for my roof solar install instead of screws.
Can you tell me what size and thread well nut to use for my Micro Minnie roof?
And should I try dumb luck to avoid hitting a cross member, or measure? Or just avoid areas likely to have cross framing, like vents and A/C.
Thanks for your guidance.
__________________
Jim. Former, 2021b Micro Minnie 2108DS
Boondocking again. Now with a full-electric Tune M1 on a F150. No commercial campgrounds allowed.
|

|

|
|
03-09-2022, 02:33 PM
|
#62
|
|
Winnebago Master
Join Date: Oct 2017
Location: Elk Grove, CA
Posts: 3,618
|
1. Why would you want to avoid a cross member? It would provide the strongest attachment point, ideally for the front edge.
2. Here's a link to a page from a well nut manufacturer with the various sizes and the thickness range they fit. You'll want something that will fit your 7mm = 0.276" thick OSB. A quick look shows that # 16253 and #16255 would work. They use a 1/4" x 20 screw. #16254 would also work. It uses a slightly smaller M6 metric screw.
Even if you don't buy from this manufacturer, this will give you an idea of what you're looking for. The two critical factors are screw size and the "grip range". Either 1/4" or M6 would be fine.
__________________
Bob C
2002 Itasca Suncruiser 35U
Workhorse Chassis
|
|
|
|
|
03-09-2022, 02:38 PM
|
#63
|
|
Winnebago Owner
Join Date: Oct 2020
Location: Asheville, NC
Posts: 1,708
|
Thanks Bob, was thinking a cross member may be too thick for the well nuts to go through. I guess not if using a long enough nut.
__________________
Jim. Former, 2021b Micro Minnie 2108DS
Boondocking again. Now with a full-electric Tune M1 on a F150. No commercial campgrounds allowed.
|
|
|
|
|
03-09-2022, 05:03 PM
|
#64
|
|
Winnebago Master
Join Date: Oct 2017
Location: Elk Grove, CA
Posts: 3,618
|
I forgot the link in my post #62:
http://www.clipsandfasteners.com/v/v..._catalog99.pdf
1. Why would you want to avoid a crossmember? Screwing into a crossmember with a conventional screw is going to be stronger than a well nut and is preferable, especially if it's the front edge of your panels. You can probably use a stud finder to locate them. When drilling the
2. You can't use well nuts on a cross member even if you found some long enough. They need to penetrate all the way through and snug up on the underside to be effective. This would be visible on the underside of your ceiling. I suppose short ones might hold via the friction achieved by tightening but this wouldn't be as strong as a screw.
3. Think of a well nut as a rubber molly bolt. Here's how they work (note the need to use a washer on top so the mounting screw doesn't sink into the rubber:
https://www.albanycountyfasteners.co...are-they-used/
4. When drilling the 1/2" or so diameter holes for your well nuts, drill a small pilot hole first to make sure you're not drilling into a cross member, and when drilling the 1/2" hole, just go deep enough to penetrate your OSB roof so you don't hit any wires.
__________________
Bob C
2002 Itasca Suncruiser 35U
Workhorse Chassis
|
|
|
|
|
03-10-2022, 05:08 AM
|
#65
|
|
New to this....
Join Date: Dec 2021
Posts: 175
|
I have run into problems. I have had no luck running new solar line.
Trying not to go with conduit route. About to install new solar entry gland closer to front cap.
We were supposed to leave Friday. I dont think that is happening.
I still need to run 12 v line from charger/ inverter to fuse panel. I need to connect the 120 line, and run the shore power line still.
We attempted to call RV repair people, however they wont touch it because I have done work to it.
One guy really made me mad, (saying that nicely) basically belittled me on the phone because he had years of experience .
That messed with the rest of my night.
If Im looking for a good place to run new entry gland, what can I expect to find at the front cap where Winnebago says solar wire is run.
I connected LA battery last night to check for power at the base of the old solar wire coming down. No power, so it does not appear to be connected to anything at the top.
__________________
2012 Chevy Silverado 2500HD Z71 4X4 w/ 4:10 Gear Ratio 2.5" Receiver. Z82 Package.
2022 Winnebago 2301BHS, w/ Victron Solar System
|
|
|
|
|
03-10-2022, 07:40 AM
|
#66
|
|
Winnie-Wise
Join Date: Apr 2017
Location: South Central, Pennsylvania
Posts: 452
|
Quote:
Originally Posted by Sentry
I have run into problems. I have had no luck running new solar line.
Trying not to go with conduit route. About to install new solar entry gland closer to front cap.
We were supposed to leave Friday. I don’t think that is happening.
I still need to run 12 v line from charger/ inverter to fuse panel. I need to connect the 120 line, and run the shore power line still.
We attempted to call RV repair people, however they won’t touch it because I have done work to it.
One guy really made me mad, (saying that nicely) basically belittled me on the phone because he had “years of experience” .
That messed with the rest of my night.
If I’m looking for a good place to run new entry gland, what can I expect to find at the front cap where Winnebago says solar wire is run.
I connected LA battery last night to check for power at the base of the old solar wire coming down. No power, so it does not appear to be connected to anything at the top.
|
If your front cap has the same underlying structure as ours, I don't believe you can go that route. Ours has multiple aluminum cross members behind the front cap. See attached PDF.
You may want to contact Winnebago and request construction drawings for your specific year and model. Here's a link to one of my previous posts that contains an example of the email I sent to Winnebago requesting construction drawings. Though it did take a day or two to receive them. You may want to try and contact them by phone to speed up your request. Winnebago Towables General Inquires (574) 825-5250 or Customer Care
(574) 825-8052.
__________________
2016 Winnebago Micro Minnie 2106DS, 200Ah BB, 400w rooftop & 500w front cap solar
2020 Tundra SR5 DLCB TRD Off Road, 5.7L V8 w/6.5' bed & 38 gal. tank, 4.30 axle ratio
Blue Ox Sway Pro w/750# bars, wired RVS rear view camera, Renogy 20A DC/DC charger
|
|
|
|
|
03-10-2022, 08:46 AM
|
#67
|
|
Winnebago Master
Join Date: Oct 2017
Location: Elk Grove, CA
Posts: 3,618
|
What gauge is the old solar wire? If it's 10 gauge, you could use it if you can locate the top end. Winnebago should be able to help.
Failing that, from the drawings, it looks like coming down through the front cap is problematical. Have you considered routing the wire down, inside one of your front wardrobe cabinets? That would be my choice. You'll never know it's there and it should be easy to install.
By the way, if you haven't bought your wire, I've used 10 gauge twin lead 12V landscape cable from Home Depot. Being twin lead, it's easy to route and is relatively inexpensive. It's also weather and UV resistant.
__________________
Bob C
2002 Itasca Suncruiser 35U
Workhorse Chassis
|
|
|
|
|
03-10-2022, 09:51 AM
|
#68
|
|
Winnie-Wise
Join Date: Apr 2017
Location: South Central, Pennsylvania
Posts: 452
|
Just a FYI, when I installed our solar, I had the same thought as BobC, running the wires down through the front wardrobe cabinet. What I found was, our cabinet was completely under the bow of the front cap and not the actual roof. Looking at the floorplan of your Minnie, you may find the same thing. If you go that route, and your cabinet is under the cap, just be aware you will be mounting the gland to your front cap and not the roof. Not that that would be an issue that I can see as long as it is sealed properly, accept maybe aesthetically, I just wanted to make you aware of that possibility.
__________________
2016 Winnebago Micro Minnie 2106DS, 200Ah BB, 400w rooftop & 500w front cap solar
2020 Tundra SR5 DLCB TRD Off Road, 5.7L V8 w/6.5' bed & 38 gal. tank, 4.30 axle ratio
Blue Ox Sway Pro w/750# bars, wired RVS rear view camera, Renogy 20A DC/DC charger
|
|
|
|
|
03-10-2022, 09:57 AM
|
#69
|
|
Winnebago Camper
Join Date: May 2018
Location: Cypress, TX and Woodland Park, CO
Posts: 48
|
Follow up from Freds 7 pin connector test
Took the 2106FBS Boondocking this past weekend. I carefully monitored the actual amperage going in to my Ionic 100ah lithium battery while idling and traveling with the 7 pin connector feed. The Ionic has a great Bluetooth app which I used while traveling. The amps varied from 2 volts discharge to 10 amps charging. The fridge, radio, and safety alarms were on, the minimal parasite loads. The state of battery charge was 79% at the start and after 225 miles was 98%. The SUV has a smart alternator and a AGM battery. I believe the 7pin Hot conductor wire which charges the rv battery is 12 gauge which should handle the 10amp flow without any problems. Given all of this, I believe that with my single 100AMP Hr powered from the 7 pin connector will be just fine and will not require a DC/DC converter. The alternator feeding AGM battery set up may be the key. (Charge profile for car may be similar to lithium) I just dont know if that has any bearing or not. Someone out there may know the answer to that. The bonus was the rv battery charged while traveling which was not a requirement for me. I was hoping to just maintain the level of charge with the 7 pin connector. THANK YOU FRED for your information in helping me get past the question of additional equipment I might have needed.
|
|
|
|
|
03-10-2022, 05:54 PM
|
#70
|
|
New to this....
Join Date: Dec 2021
Posts: 175
|
Quick update....
WE were able to run new solar lines. I also have a guy RV repair guy willing to take on the on the project and see it thorough. He will come tomorrow. Ran it into front cap, and through front cabinets. New solar gland. Old one is just goopped up for now until I can come up with something.
I have 90% or more done... He should only need to connect a couple wires after looking at the system as I have done it.. Understandable....
We are about to attache solar panels to roof... Chance of rain is low as it appears... So crossing fingers....We should be leaving Saturday at latest.. One day late.
__________________
2012 Chevy Silverado 2500HD Z71 4X4 w/ 4:10 Gear Ratio 2.5" Receiver. Z82 Package.
2022 Winnebago 2301BHS, w/ Victron Solar System
|
|
|
|
|
03-10-2022, 05:57 PM
|
#71
|
|
New to this....
Join Date: Dec 2021
Posts: 175
|
BY the way, I have a flux capacitor now.... Pic later....
__________________
2012 Chevy Silverado 2500HD Z71 4X4 w/ 4:10 Gear Ratio 2.5" Receiver. Z82 Package.
2022 Winnebago 2301BHS, w/ Victron Solar System
|
|
|
|
|
03-10-2022, 08:13 PM
|
#72
|
|
New to this....
Join Date: Dec 2021
Posts: 175
|
__________________
2012 Chevy Silverado 2500HD Z71 4X4 w/ 4:10 Gear Ratio 2.5" Receiver. Z82 Package.
2022 Winnebago 2301BHS, w/ Victron Solar System
|
|
|
|
|
03-10-2022, 09:15 PM
|
#73
|
|
Winnie-Wise
Join Date: Apr 2017
Location: South Central, Pennsylvania
Posts: 452
|
Lookin good! Hope the rest of the build goes well and your able to leave Saturday. Have a Great Trip and update us on the final build and how it works after your trip.
__________________
2016 Winnebago Micro Minnie 2106DS, 200Ah BB, 400w rooftop & 500w front cap solar
2020 Tundra SR5 DLCB TRD Off Road, 5.7L V8 w/6.5' bed & 38 gal. tank, 4.30 axle ratio
Blue Ox Sway Pro w/750# bars, wired RVS rear view camera, Renogy 20A DC/DC charger
|
|
|
|
|
03-24-2022, 08:02 PM
|
#74
|
|
New to this....
Join Date: Dec 2021
Posts: 175
|
Solar panels are still holding on good, last check. Was receiving 500 + watts earlier today.
I’ll have screen shots to put up when I get back to a computer.
Can’t say I have run the batteries dry as of yet. Hard to do when arriving middle of day or later. But it will run microwave and convection oven long enough to cook for about 20 minutes or so. and A/C for very short time, didn’t really test this long. But estimated time did start going down quickly even with the slow start.
I’ve been able to run 2 maxxair fans full power for quite a while.lights, tv. I’ll do not testing soon, and run it down pretty good.
While suns out it pretty much reads infinite.
__________________
2012 Chevy Silverado 2500HD Z71 4X4 w/ 4:10 Gear Ratio 2.5" Receiver. Z82 Package.
2022 Winnebago 2301BHS, w/ Victron Solar System
|
|
|
|
|
03-24-2022, 08:03 PM
|
#75
|
|
New to this....
Join Date: Dec 2021
Posts: 175
|
We’re in las cruses New Mexico tonight on trip back. Should be back by Monday. Need to return to work Wednesday
__________________
2012 Chevy Silverado 2500HD Z71 4X4 w/ 4:10 Gear Ratio 2.5" Receiver. Z82 Package.
2022 Winnebago 2301BHS, w/ Victron Solar System
|
|
|
|
|
03-26-2022, 10:19 AM
|
#76
|
|
Winnebago Camper
Join Date: Feb 2022
Posts: 6
|
Junction box Black Wire
Quote:
Originally Posted by Sentry
I cannot say I have made any real progress today... I guess I am enamored by dealing with the underbelly...
Made a couple battery wires, and played with shunt a bit... That got fun. Different build than in video...
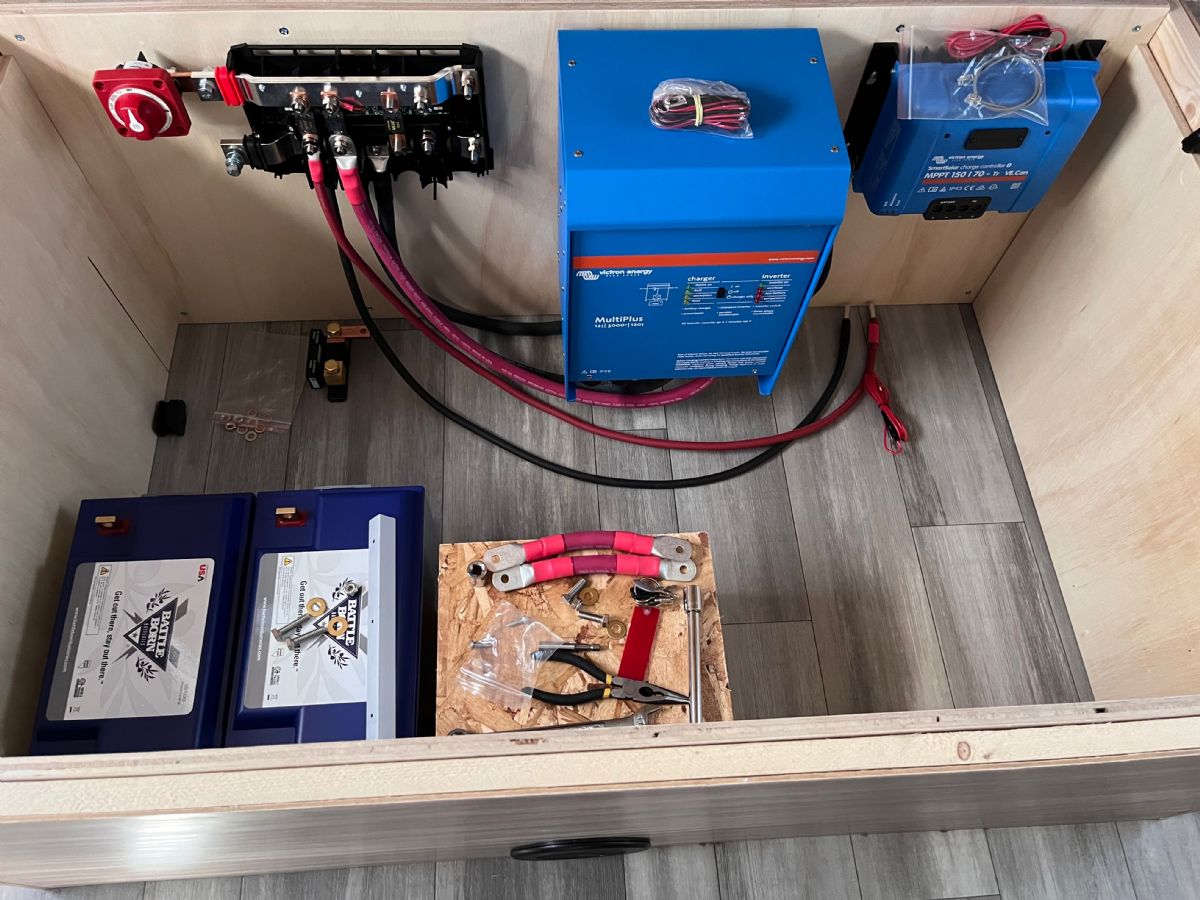
I cut a couple of brackets to hold batteries in one place....
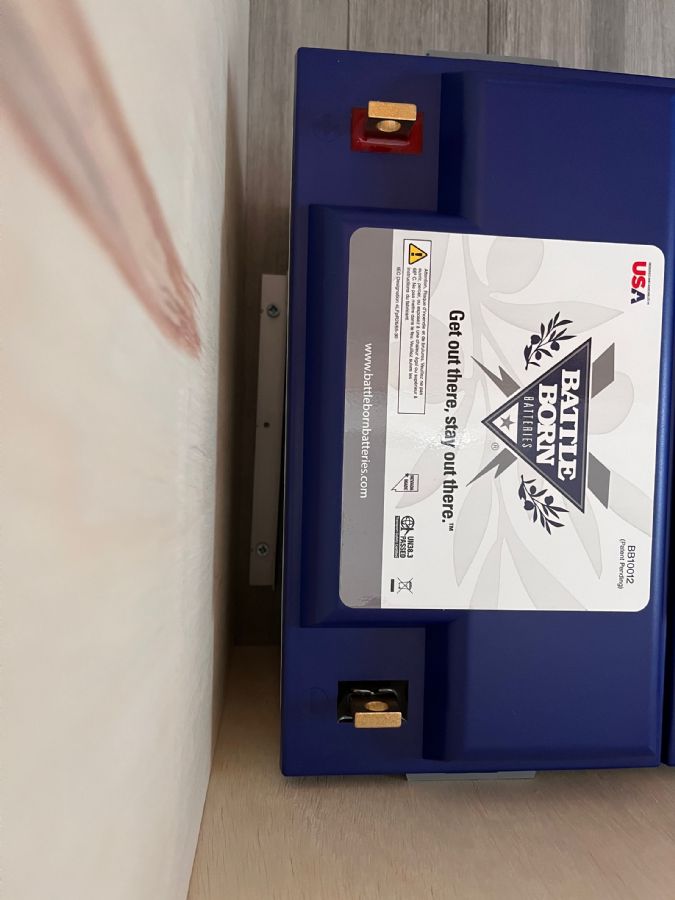
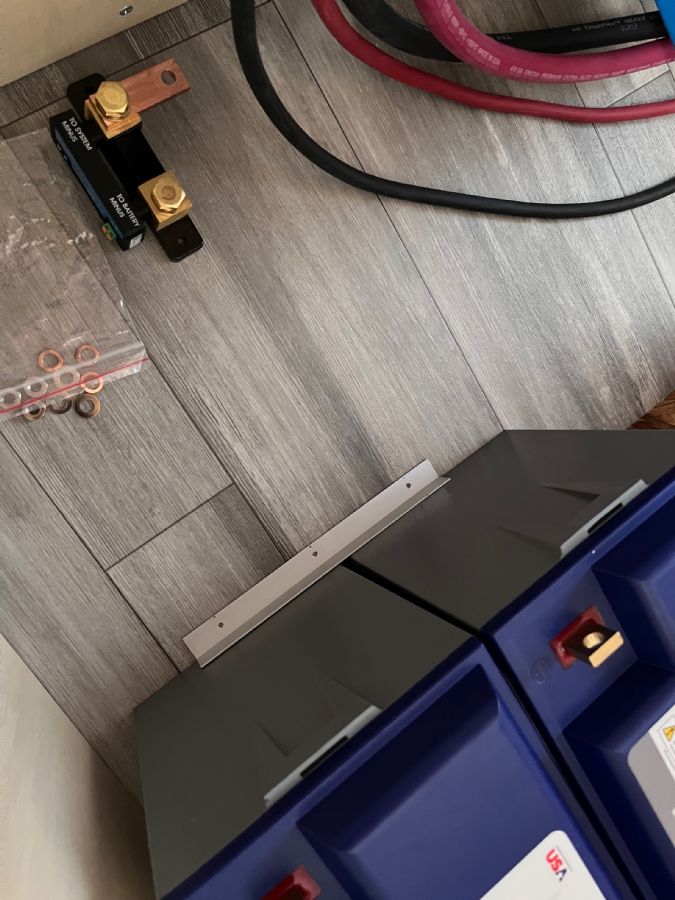
I have decided against trying to pull the plastic cardboard all the way down, vs cut openings and tape panels back on using zip tape.
I am curious about the first junction box.
I can see the battery wire (Thick Red wire)... Once I disconnect that from that junction box how does power get to those items which are connected to it.
What could the wires on the bus bar be?

Trailer lights are a given, those only work while its hooked up to truck. There are other wires there, I am not certain of... outside of the trailer jack. Still how would that get power?
Help is needed... Need to make progress this weekend or I'll be sitting in a dead trailer for two weeks... Outside of propane. |
I too was curious about the Junction Box. Since I have two 100 AH Lithium Batteries, & when in Tow, the Black Wire, is charging the system as I drive.
I heard that when in tow, the vehicle Alternator could be overwhelmed by the Lithium Batteries taking a huge charge load, causing the Alternator to burn out or catch fire.
So, I disabled the vehicle charge wire (The Black Wire) using a 40 amp flip fuse.
Then, When I tow my Minnie its (Black Charge Wire) disconnected & when I tow other Trailers Ill flip it back on.
Any thoughts?
|
|
|
|
|
03-26-2022, 03:38 PM
|
#77
|
|
Winnie-Wise
Join Date: Jul 2019
Location: Rochester, MN
Posts: 452
|
Quote:
Originally Posted by GunPatriot
I too was curious about the Junction Box. Since I have two 100 AH Lithium Batteries, & when in Tow, the Black Wire, is charging the system as I drive.
I heard that when in tow, the vehicle Alternator could be overwhelmed by the Lithium Batteries taking a huge charge load, causing the Alternator to burn out or catch fire.
So, I disabled the vehicle charge wire (The Black Wire) using a 40 amp flip fuse.
Then, When I tow my Minnie its (Black Charge Wire) disconnected & when I tow other Trailers Ill flip it back on.
Any thoughts?
|
I've heard this, too, but have yet to see more than 18A provided by my vehicle feeding two BB batteries when they are nearly empty. I haven't tracked down the wire gauge from my alternator to the hitch, but I assume I get enough voltage drop I will never see "better" than this. That leads me to wonder, though, if an 18A draw for a significant period will burn out the alternator. My hunch is no, but I don't really know.
The batteries certainly can't draw 100A. I believe I have a 40A fuse in the path too.
__________________
Todd
2019 Micro Minnie 2108DS with upgrades and mods here
2020 Toyota Land Cruiser, RedArc TowPro-Elite, Andersen 3380 WDH
|
|
|
|
|
03-26-2022, 04:14 PM
|
#78
|
|
Winnie-Wise
Join Date: Jul 2019
Location: Rochester, MN
Posts: 452
|
Quote:
Originally Posted by Fred 2106DS
I ran the tests today using my 2020 Tundra and 2016 2106DS MM.
...
Fifth, I ran the same 7-pin connecter tests with the engine at 2000 RPM. The voltage and amperage entering the LiFePO4 batteries was 13.65 V @ 4.6 A. The alternator amperage output was 12.6 A. I forgot to measure the alternator voltage, but I wouldnt expect it to be a problem.
Sixth, I ran the same tests at idle with my 20 A DC/DC charger connected, along with the 7-pin connector also being connected. The alternator output readings were 13.31 V @ 29.2 A. At the input side of the DC/DC charger, the readings were 12.84 V @ 25.4 A.; and the output readings of the DC/DC charger were 13.66 V @ 19.3 A.
Based on the above readings, I dont see an amperage issue when using the 7-pin connector with LiFePO4 batteries, at least with my setup. The amperage draw through the 7-pin connector seems minimal even when connected to a somewhat depleted LiFePO4 battery.
One thought I had after running these tests on the 7-pin connector, I wonder if my Tundra limits the current through the 7-pin connector being that its factory equipped for towing.
|
Going back through this thread, I think I had a little ah-ha moment based on this test that Fred did with his Tundra. I am very certain that the current is limited, but perhaps not on purpose, but due to the wiring gauge of the harness as well as the charging profile the vehicle will produce. I very much doubt you are ever going to see over 13.65V or so. Certainly you won't ever see the 14.4V that you'd like to have into your lithium batteries.
So here's the ah-ha moment. Note what the DC-DC charger does. It can produce a higher voltage! It took a 12.84V input voltage and gave the batteries what they wanted. And look at that current! Ok, I'm a little excited by this thought  . That is, I was thinking all along the DC-DC charger would protect the alternator (and that I don't need that), but I wasn't considering the charger would actually (greatly) improve the charging situation. I'm liking that thought!
I don't mean to hijack this thread, but thought I should point it out. Perhaps this is obvious to many, but it's new to me. I'm thinking it's the real reason to get a DC-DC charger.
__________________
Todd
2019 Micro Minnie 2108DS with upgrades and mods here
2020 Toyota Land Cruiser, RedArc TowPro-Elite, Andersen 3380 WDH
|
|
|
|
|
03-26-2022, 04:15 PM
|
#79
|
|
Winnebago Master
Join Date: Oct 2017
Location: Elk Grove, CA
Posts: 3,618
|
Quote:
Originally Posted by tinglett
I've heard this, too, but have yet to see more than 18A provided by my vehicle feeding two BB batteries when they are nearly empty. I haven't tracked down the wire gauge from my alternator to the hitch, but I assume I get enough voltage drop I will never see "better" than this. That leads me to wonder, though, if an 18A draw for a significant period will burn out the alternator. My hunch is no, but I don't really know.
The batteries certainly can't draw 100A. I believe I have a 40A fuse in the path too.
|
There's a lot of information, floating around about this and it all depends on the alternator and your 18A comments make sense. The safe solution is to install a DC to DC charger between the batteries and the tow vehicle. Renogy has a couple of relatively inexpensive ones, a 20A, a 40A and a 60A. All are currently on sale:
Renogy also makes a solar controller/DC to DC Charger combo unit.
Here's a link to a video by Will Prowse reviewing the 20A and 40A Renogy units:
__________________
Bob C
2002 Itasca Suncruiser 35U
Workhorse Chassis
|
|
|
|
|
03-26-2022, 04:20 PM
|
#80
|
|
Winnie-Wise
Join Date: Jul 2019
Location: Rochester, MN
Posts: 452
|
Quote:
Originally Posted by Sentry
WE were able to run new solar lines. I also have a guy RV repair guy willing to take on the on the project and see it thorough. He will come tomorrow. Ran it into front cap, and through front cabinets. New solar gland. Old one is just goopped up for now until I can come up with something.
|
@Sentry, perhaps I missed it, but I didn't follow how you managed to run your solar lines. Did you pull the lines through using the existing line?
My 2018 2108DS doesn't have the solar line at all. Instead it has the zamp connector on the side, which I did re-route into a real solar controller. So I have a looming problem of how to eventually route cable to the roof. If you managed to route through the front cap, I'm very interested, but based on Fred's PDF that's looking very unlikely for me. I thought about the front cabinets, too, and it's good to know in advance the peril in that path.
__________________
Todd
2019 Micro Minnie 2108DS with upgrades and mods here
2020 Toyota Land Cruiser, RedArc TowPro-Elite, Andersen 3380 WDH
|
|
|
|
|
|
|
Currently Active Users Viewing This Thread: 1 (0 members and 1 guests)
|
|
|
 Posting Rules
|
You may not post new threads
You may not post replies
You may not post attachments
You may not edit your posts
HTML code is Off
|
|
|
|
 » Recent Discussions
 |
|
|
|
|
|
|
|
|
|
|
|
|
|
|
|
|
|
|
|
|
|
|
|
|
|


 Linear Mode

